
Getting Started
Bead Them Up invites you to enter the wonderful world of Beading
Bead Them Up welcomes all beginner beaders. We are very happy to be able to help you in taking your first steps towards making your own beautiful beaded jewellery!
Step 1:
The first step to beginning beading is to decide what you wish to make. Sounds simple! However it is really the most important step. We have included all instructions you will need to get started in our Techniques section, and a Bead Inspired Projects section to help get you started in the design process.
We have found that it can be very overwhelming in the beginning with all the possibilities available to you, so we have created three basic categories for you in the Bead Inspired Projects to choose from: earrings, bracelets and necklaces so, take your pick and continue onto the next step in your creative journey!
Happy Beading from Julie and Dixie
How do I place an order?
Ordering your selection from our web site is as easy as selecting ‘BUY NOW’. Your selected product will be included in your shopping basket. When you have completed shopping and wish to confirm your order, select ‘View Cart’. You can then change the quantity of goods that you would like to purchase, or remove goods from your cart. Your order will be finalised when you select ‘Check Out’.
If you are not already logged in you will need to at this time (it is always preferable to log in when starting as products added to your cart will be saved even if you do not complete the order at this time).
To confirm your order, payment options and shipping details, select ‘Submit Order’. By submitting your order, you agree to these terms and conditions, the terms and conditions that apply to use of the website and our privacy and security policy. [You may not cancel an order after you submit it.]
Are there limits on what I can order from you?
Bead Them Up holds limited quantities of stock. For that reason, we have specified maximum order limits for some items. When stock is sold out we restock as soon as possible.
What prices apply to your goods? Are trade discounts available?
The prices that apply to our goods are set out in the website inclusive of GST. We do offer Trade discounts to registered business owners, if you wish to apple to for wholesale please contact us using the Wholesale tab.
Glossary: Findings - Jewellery Metals
Findings are the pieces, in jewellery, made from metal. For example clasps, connectors, jump rings and earring parts.
Bead Them Up sells findings made from Sterling Silver, Vermeil, Gold and Gold Filled and a variety of base metal findings.
Sterling Silver
Sterling Silver is an alloy containing 92.5% pure Silver and 7.5% other metals, usually Copper.
Silver Filled
Silver filled is a process in which heat and pressure are used to laminate Silver to brass. This is not to be confused with Silver plating where a thin layer of Silver is electroplated onto various base metals. The Silver layer is 100 times thicker in Silver filled than that of Silver plated, making it more durable and suitable for daily wear. The Silver filled findings we sell are 1/10th Silver. This means that it is Silver bonded on brass and that 1/10th of the volume is silver and 9/10th's is brass.
Vermeil
Vermeil is a base of solid Sterling Silver coated, via electroplating, with pure Gold; the Gold layer is very thin and fine.
Gold Filled
Gold Filled is a process in which heat and pressure are used to laminate the gold to brass. This is not to be confused with gold plating where a thin layer of gold is electroplated onto various base metals. The gold layer is 100 times thicker in gold filled then that of Gold plated, making it more durable and suitable for daily wear. With the proper care gold filled jewellery can last a lifetime. The gold filled findings we sell are 1/20th 14ct gold. This means that it is 14ct Gold bonded on brass and that 1/20th of the volume is gold and 19/20th's is brass
Base Metal
Base metal findings are made from non-precious metals; usually brass and nickel; they can also have a layer of Sterling Silver or Gold electroplated onto the surface.
Jewellery Threading Materials
Jewellery wire
Jewellery wire is nylon coated stainless steel wire used for stringing beads; Bead Them Up uses and recommends Griffin Brand; 19 strand, 0.35mm wire, it is fine enough for seed pearls and all small hole gemstone beads yet flexible enough to knot when beaded as a Lariat. The main advantage of Griffin wire is its flexibility and that it does not kink once it has been threaded with beads. Larger/heaver beads may require Griffin Brand 19 stand wire 0.45mm or 0.6mm thick jewellery wire.
Spool Wire
Wire made from metal use for wire wrapped loops etc.
Tiger Tail
Tiger tail is a lesser quality and cheaper type of jewellery wire, it can kink if not used carefully, even after being threaded with beads. Tiger tail may not be fine enough to thread through small hole beads.
Illusion cord
Illusion cord is a clear bead stringing cord which looks like fishing line, and is used when making illusion or floating style jewellery; it gives the impression that there is no thread between the beads. Illusion cord is not as durable or as strong as jewellery wire.
Beading Elastic
Quality beading elastic is a clear or coloured, elastic thread that will return to its original length and thickness after stretching; use for designs when a clasp is not wanted. Beading elastic is best when used as double strand thickness, and it is finished by knotting the ends with 2 or 3 overhand knots and fusing, the knots, with clear nail polish.
Silk thread
Silk is the traditional thread for stringing Pearls. Silk is best for stringing valuable pearls/gemstones when a knot is required between the pearls/gemstones. Silk thread is soft and is easier to make knots with than any other thread. Silk will fray, become dirty and stretch over time (therefore regular re-string is recommended). Silk threads are available on cards of 2 meter lengths that have a needle attached at one end. Use thicker silk for heavier/larger hole beads.
Hollow Rubber Tubing
Thread Hollow Rubber as you would a bead. It can be cut to any length and is available in 3 diameters: 2.0mm, 2.5mm and 3.0mm.
Cut rubber with scissors ensuring the edge is straight; an angled cut will make the bead sit at an angle.
Be careful not to pull jewellery wire too tight when using rubber tubing, as it will buckle.
Faux Suede
Faux Suede is a cheap alternative to real suede although not as strong.
Suede/Leather
Suede/Leather is available in a wide range of colours, thicknesses and profiles.
Silk Ribbon
Silk thread is available in a wide range of colours usually about 2-3mm thick and 1 meter long it is hand stitched and hand dyed.
Ribbon/Cords
Any ribbon or cord can be incorporated into a jewellery design if desired.
Memory wire
Memory wire is a coil of very strong, tempered metal wire that holds its shape when stretched. Memory wire makes quick and easy necklaces and bracelets that will stay on your neck or wrist without a clasp. Never cut memory wire with side cutters and always protect your eyes when cutting.
Crimp
A crimp bead is a soft, metal bead which is squeezed shut with a crimping tool to secure jewellery wire to findings.
Floating Crimp
A floating crimp bead is used to hold beads in place when creating floating necklace type design; floating crimps are not strong and should not be used when securing clasps or other attachments.
Bullion/french wire/gimp and wire guardians
Bullion/french wire/gimp and wire guardians are used to protect jewellery wire from friction wear and to conceal stringing material.
The use of either is a personal choice;
Bullion/french wire/gimp is a more traditional and a cheaper product.
Wire guardians are easier to use.
Bullion/french wire, also known as gimp, is a fine coil of wire and comes in one length, it is cut into smaller lengths and used as required.
Wire guardians are a rigid horse shoe shaped tubular finding.
Some clasps will have a fine attachment ring, and bullion/french wire may be the only option available, either product should always be used to protect wire from undue wear and reduce abrasions from clasps and other sharp-edged components.
Glossary: Jewellery Tools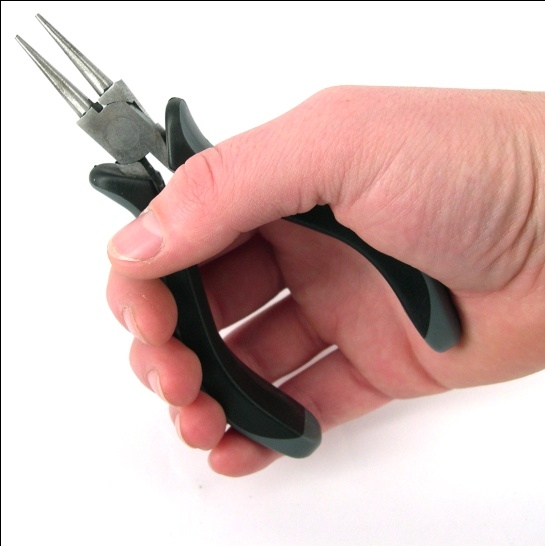
Good tools are required; the four essentials are Round, Chain or Flat, Crimping Pliers and Side Cutters. Stored properly tools will last for years.Do not purchase unnecessary or "gimmicky” tools as they are not required.
Round Nosed Pliers
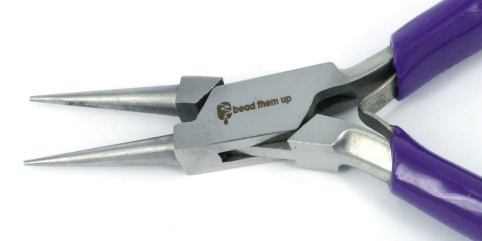
Round nose pliers have a round and tapered nose. They are used to bend and shape wire into loops and circles. Use the narrower end of the nose to make small loops, and make larger and larger loops as you work towards the base of the nose. A narrowly tapered nose is preferred for finer work.
| Chain |
Flat |
 |
 |
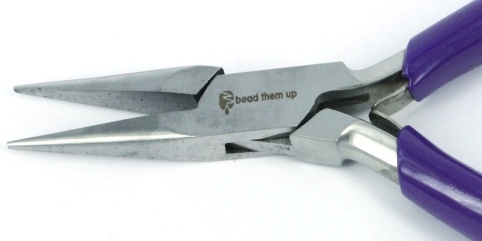
Chain/Flat Nosed Pliers
Chain/Flat nose pliers are flat on the inside of the nose.
They are used to hold jewellery findings and wire securely when working.
Chain nose pliers have a more tapered nose than flat nose pliers and can get into tighter spaces; though which ever tool you choose is personal choice. They do more or less the same job.
Make sure the inside of the nose, the flat area, is smooth and not textured, textures will mark the wire or metal when working.
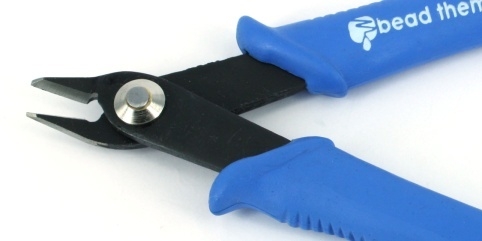 |
Side/Wire Cutters
Side/Wire cutters have a sharp, fine pointed nose like a pair of scissors.
They are used when you need to trim wire as close as possible
- ALWAYS PROTECT YOUR EYES WHEN CUTTING
- Never cut memory wire with Side Cutters
- Use memory wire cutters instead as the blade of side cutters will be damaged).
Make sure the nose of the cutter you purchase meets evenly at the tip. Only purchase a good quality set of cutters. Side cutters will need to be replaced when they are no longer cutting properly (blunt). |
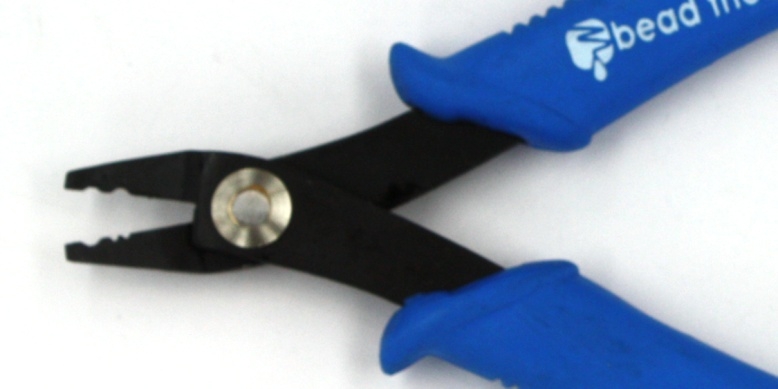
Crimping Pliers
A crimping tool is specifically designed to squeeze closed crimps.
Crimps that are closed by using crimping pliers will give smaller, rounder and stronger crimps; crimps closed flat, can loosen, are not as strong, can scratch the skin and look less attractive. |
 |
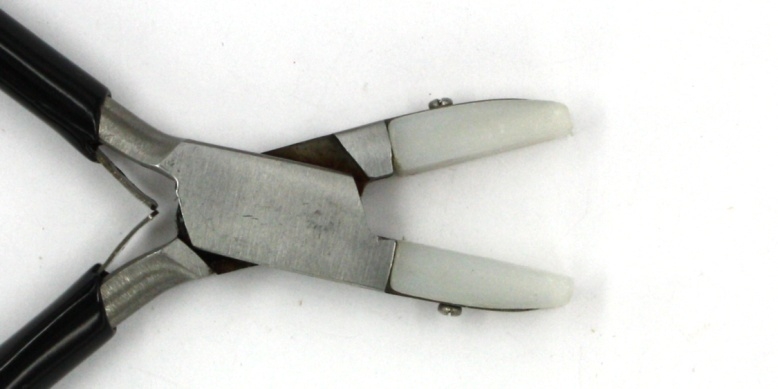 |
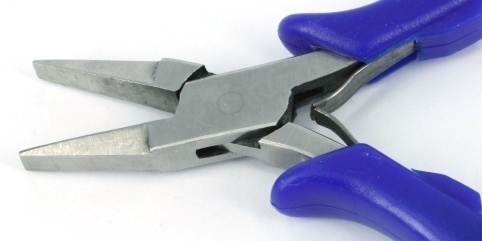
Nylon Jaw Pliers
Nylon jaw pliers have a nylon lined jaw and are used to straighten or bend wire into shapes they do not to leave a mark when working.
|
Split Ring Pliers/Tweezers Split ring pliers/tweezers have a triangular, pointed, 90 degree angled jaw that hangs over a flat nose jaw; they are used to make opening split rings easier. |
 |
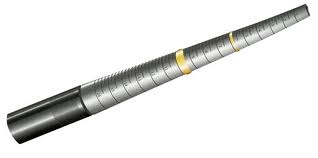 |
Mandrel
A mandrel is a round metal bar of even thickness. Mandrels are used to make jump rings and round shapes with wire, glass beads are also formed around a mandrel. |
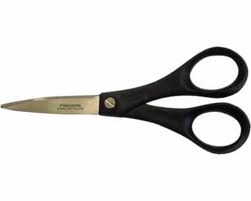
Scissors Small sharp scissors are a very useful tool in your tool box; use when cutting temporarily strung strands, bullion/French wire and when working with silk or cords. |
 |
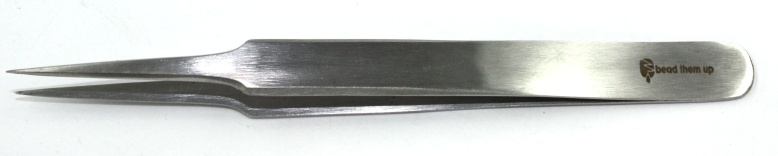 |
Pearl Tweezers
Pearl tweezers are used when knotting beads on silk thread, use to:
- Tighten knots.
- Push knots close to beads.
- Re-open a dropped knot.
- Move a knot.
|
Awl
An awl is a beading tool also used for tightening and positioning knots in the correct position (a sewing pin with a glass end will work just as well). |
 |
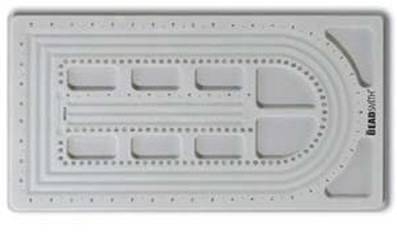 |
Bead Board
Bead boards have curved grooves with measurements and compartments, handy for setting out a design and keeping beads in order as you work.
|
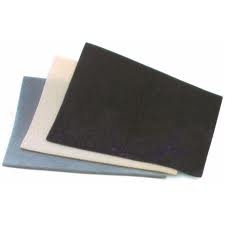
Bead Mat
Bead Mats are a soft felt mat that helps stop beads from rolling away. |
 |
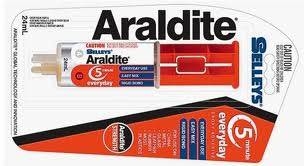 |
Adhesives
A two part epoxy resin type glue (for example 5 minute araldite) is ideal when a clear and strong bond is required, always follow the packet instructions.
|
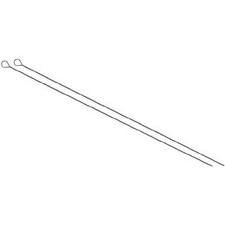
Collapsible beading needle
This is a re-usable beading needle that is flexible and is most commonly used with beading elastic. The eye of the needle collapses as it is pulled through beads the eye can be re-opened with a sewing needle or awl. |
 |
 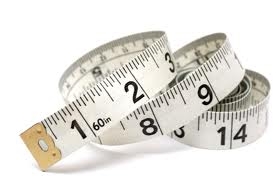 |
Measuring tape/rule
A measuring tape/ruler is useful in your beading box, mark with preferred necklace, bracelet and elastic bracelet lengths, also the mark the centre point to help when positioning pendants or features beads.
|
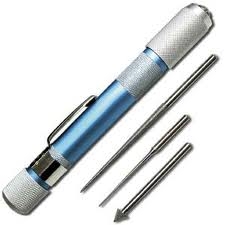
Bead Reamer
Bead reamers are small tapered diamond coated files that are used to clean or enlarge holes in beads. Bead reamer sets include three files and a handle. When using keep the file wet as the diamond coating can strip off if used dry, the water also keeps the beads from overheating, cracking, shattering or chipping. Files can be fitted to a slow speed hand drill; NB use only a battery operated drill as you do not want to work with water and electricity together. |
 |
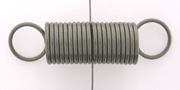 |
Creation Keeper
A creation keeper or bead stopper is a spring, preferably stainless steel that secures beads on thread/s and will maintain the structure of beadwork until a project is completed.
|
Wire Gauge conversion Chart
|
Gauge |
Inches |
mm |
|
12 |
0.081 |
2.05 |
|
13 |
0.072 |
1.83 |
|
14 |
0.064 |
1.63 |
|
15 |
0.057 |
1.45 |
|
16 |
0.051 |
1.29 |
|
17 |
0.045 |
1.15 |
|
18 |
0.04 |
1.02 |
|
19 |
0.036 |
0.91 |
|
20 |
0.032 |
0.81 |
|
21 |
0.029 |
0.72 |
|
22 |
0.025 |
0.65 |
|
23 |
0.023 |
0.57 |
|
24 |
0.02 |
0.51 |
|
25 |
0.018 |
0.45 |
|
26 |
0.016 |
0.4 |
Problem solving
Necklace is too short:
Add an extension chain or wire wrapped beads to extend.
or
Re-thread; Cut the necklace near the clasp and re-use the Jewellery wire for a bracelet.
There are not enough beads for the length of Jewellery design I want:
Add complementary beads to the design, either at the back or include as part of the design.
or
Add some chain to either side of the design at the back.
or
Make wire wrapped loops to connect the beads, instead of threading.
Bead is chipped near the hole:
Cover the chip on the bead with a bead cap/rondel or another bead if possible.
or
Use the bead at the back of a necklace.
Bead has a large hole and does not sit straight:
Place a smaller bead to sit inside the hole.
Jewellery designs on Jewellery wire keep breaking as one of the beads has a sharp edge:
Use a smaller bead to sit inside the hole keeping the Jewellery wire away from the sharp edge.
or
Ream the sharp edge with a bead reaming tool.
or
Use that bead on a wire wrapped project.
Bead slides off the end of the headpin:
If a bead has a hole too big for the head pin use a cap/daisy or smaller bead before the larger bead.
or
Use a headpin with large a decorative head.
I lose beads/design when I have to pack-up before finishing:
Work on a tray or bead board that can be put away easily (for example on top of the fridge), if you need to pack away quickly. Always have a few creation keepers handy and use them. See Jewellery Tools
My Jewellery wire threaded design buckles and looks kinked: too tight
Work the Jewellery design in your hands to see if the beads will "settle” and fit better together. If this does not work you will need to restring. Do not pull so tight next time when finishing.
My Jewellery wire threaded design has gaps and the wire is visible: too loose
Fill the gaps with crimp covers. Check the tension more closely before final crimping next time, a design laid in a straight line while gently sliding fingers along the length towards the finished end will help.
Why does my bracelet fall off?
How to get the Perfect Bracelet fit:
Have you ever wondered why that bracelet design seems to be a perfect fit until the first time you wear it?
The answer is simple
Getting a perfect fit for a bracelet is essential, using a toggle clasp as often as possible is the answer.
Use either the necklace finishing technique or the wire wrap loop technique. Start our Jewellery design and continue until you can fit the Jewellery design around your wrist. Make the design meet end to end with no gaps and no overlapping beads, excluding the chosen Toggle.
When a Toggle clasp is added to this length it should fit perfectly, and the following should not happen:
Toggle clasp comes undone on its own.
WHEN USING A TOGGLE CLASP:
Make sure the bead closest to the bar end of the Toggle is not too big. A Bead that is too big will stop the bar from going through to ring of the Toggle.
Tips and Tricks when making Jewellery
- Save all Sterling Silver scraps as they can be melted down by a jeweller to create your own unique piece or sold to a metal merchant.
- Good quality Jewellery wire and finishing products can sometimes be more important than the beads, a piece that sites will always look better than a piece that does not.
- A good set of cutters can be your most important tool
- Check your length before finishing Jewellery designs; it can be expensive to re-thread.
- Always remove open jump rings (where possible), and use permanent connectors (such as Jumplocks or wire wrapped loop technique) to make your design more secure.
- Leave beads in packets or store in storage containers with price paid per bead and stockist code; it will make it easier to re-supply and makes pricing easier (price individual beads, before cutting the strand, will make it is easier to calculate).
- Rather than throwing out damaged beads, they can still be used at the back of a Jewellery design, or by concealing damage with a bead cap.
- Compliment your Jewellery design with a clasp that matches the shape of the bead for example; oval clasp with oval beads.
- Use a bust when making a complicated necklace; it will be much easier to get it to sit right.
- Keep all your tools together in a handy tool box.
- If making a random Jewellery design with lots of different beads, sometimes a bead board can be a waste of time. If it looks good as you thread it up, it will be great (check the design approx every 4cm if not confident).
- Colours and shapes that look good together in the palm of your hand will always be able to be made into a stylish Jewellery design.
- Bead mats are a great idea to stop beads sliding off your working surface.
- If you wish to design a Jewellery item for a specific outfit always have the outfit with you, your bead shop should be able to help you with bead and colour choices.
- A good bead shop should always be able to recommend a cheaper alternative bead to use in your Jewellery design (do not compromise on focal beads).
- If design is not your strong point, copy Jewellery designs from your bead shop display, draw Jewellery designs when you see them in magazines, TV or movies.
Bead Questions answered
Why are smaller gemstone beads more expensive?
A better quality rough gemstone material needs to be used and a more experienced cutter is required to cut smaller stones.
What is Swarovski?
Swarovski is the brand name for a range of cut crystal beads made in Austria.
What is AB?
When a bead is labelled AB they have been coated (usually only on one side) which enhances the colour and sparkle and creates a rainbow effect.
What is Alloy?
Alloy Is a metal made from two or more different metals that have been melted and combined.
is the alloy of copper and zinc.
Annealing is the process when a metal or glass is heated and then cooled slowly to it stronger or more pliable.
Is the soft stone composed of mercury sulphide and is bright or brick red in colour. It is often heavily carved but most available on the market today is synthetic (due to the Mercury levels).
Glass?
Dichroic glass is made when different metal vapours are applied to the glass in extremely thin layers; up to 200 layers can be applied, with a total thickness of less than one thousandth of a millimetre. Dichroic glass has a distinctive look as it is very colourful and the colours change when viewed at different angles.
Obsidian is a naturally occurring glass, formed from volcanoes, be aware that some manmade glass beads are called Obsidian.
What is Oxidised?
Oxidised is the natural chemical process when oxygen atoms bond with the atoms of metals to produce a different chemical compounds. Oxidised Silver is also known as tarnished.
Onyx when it is dug up normally has white streaks in the stone (This is the natural form in which black onyx is found). Black agate is agate that is dyed black. Onyx is a higher density than Agate.Both are fibrous Chalcedony and belong to the quartz family, both are dyed, so basically they are the same.
If you have any other Questions you would like answered please let us know.
info@beadthemup.com.au
All you need to know about Gemstone Treatments
The term "treatment" is defined as being any enhancement process (other than cutting and polishing) that improves the colour, clarity, feature, durability or availability of a gemstone.
The practice of treating and enhancing gemstones has existed for hundreds of years; there are some gemstones that would not even exist, or would be far more expensive than they now are, were it not for treatments.
Heating
The most common treatment is heating it causes the colour of a gemstone to lighten, darken or change colour completely while also bringing about an improvement in clarity and brightness
Heating is done at temperatures ranging from 450º to 1850º Celsius for a period of 2 to 12 hours. Heating is detectable only by trained observers in a laboratory and is usually irreversible. Naturally occurring Citrine is quite rare and so the abundance of Citrine (yellow, gold and orange) is the result of heat treating Amethyst. Heat treatment is required to produce Tanzanite in shades of violet and blue, and Pink Topaz would not be available without heat treatment. These treatments are the industry standard and keep gemstones affordable and available.
The following gems are routinely heat treated:
Sapphire
Tanzanite
Citrine
Pink Topaz
Aquamarine
Paraiba Tourmaline (Neon Blue/Green)
Apatite
Ruby
Zircon (blue and colourless)
Note: Natural gemstone heating also occurs when gemstones are heated in volcanic areas.
Oiling/Filling
Oiling/Filling is the intentional filling of surface fissures with a colourless oil, wax or resin to improve the gemstones appearance. When using an oil or fill it must have the same refractive index as the stone so that the light will pass into the gemstone and back to the eye eliminating all visible inclusions.
Oiling
Oiling of Emeralds is standard as they tend to have numerous natural inclusions and surface breaking fissures, though not every Emerald is oiled (fine untouched specimens will command astronomical prices). When the rough Emerald is mined it is thrown into a barrel of oil. When cutting, oil is also used as a lubricant, the colourless oil seeps into the fissures so that they are less visible to the eye. Only Emeralds with no surface fractures are not oiled, as no oil can penetrate the gemstone
Note: Emeralds or oiled gemstones should not be put into ultrasonic or steam cleaners as the oil may leach out the gemstone may then shatter. Undamaged gemstones can always be re-oiled.
Filling
Filling is used on gemstones with surface fractures or cavities. Glass, wax, plastic/resin or other materials are used to fill these holes. This is sometimes done to Rubies. With close examination by magnification you may be able to spot differences in surface lustre.
Irradiation
Irradiation is the bombarding of gemstone material with subatomic particles or radiation, releasing electrons from their normal location and moving them to better colour-producing location. Sometimes irradiation is followed by heating to produce a better or completely different colour (Blue Topaz is the most common example).
Blue Topaz, which occurs naturally, is pale in colour; but through irradiation has created vibrant shades not found in nature.
Tourmaline can be irradiated to darken pink into red which are then indistinguishable from natural red gemstones.
Off-coloured Diamonds can be irradiated and heated to be turned into intense greens, yellows, blues, browns and pinks. These gemstones are fairly common, though irradiated Diamonds will sell for much less per carat than naturally coloured ones.
Pearls can be irradiated to produce grey or blue colours, although using dye to produce these colours is much more common. Irradiated Pearls will sell for about the same price as dyed Pearls.
Dyeing
The only gemstones that can be dyed are those with a molecular structure that will accept the dye and not release it. For example;
Agate has fine capillary tubes allowing dye to be drawn into the centre of the gemstone.
Turquoise and Howlite are soft porous gemstones allowing dye to be absorbed, although some of these treatments may only be a few millimetres deep.
Without dyeing, there would be no Black Onyx (dyed Chalcedony). Dyeing of Chalcedony is prevalent and permanent. Pearls if dyed correctly will also be colourfast (beware of cheaper dyed Pearls). This is the industry standard, as these colours do not occur in nature and so no deception is involved. To make some of these dyed gemstones colourfast they may later be impregnated with epoxy (stabilized)
Impregnation and Stabilization
Impregnation is the infusion of wax or paraffin into a porous material. Stabilization is the introduction of a bonding agent, usually plastic, into a porous material. Of the two processes, stabilization is the most permanent.
Impregnated pieces must be kept away from heat or the wax could melt or leak. Some gemstones are waxed on the surface to enhance lustre but this is not very common. Impregnation and stabilization are common for Turquoise. The upside for stabilized Turquoise is that it will not absorb oils and discolour as untreated Turquoise can.
Bleaching
Bleaching is a process for organic gem materials such as Ivory4, Coral, shell (such as Mother of Pearl) and for Pearls. It lightens the colour and is permanent and undetectable. No price difference will exist as a result.
Reconstitution
Gemstones are crushed, dyed and then reformed using resin as a stabilizing agent. (For example; some Turquoise and Hematite)
Coating
Coating is a process that has been used for over 200 years, where a lacquer or film is applied to the surface, to improve a gemstones appearance. Today, coatings are increasingly used to change and improve the colour of gems.
Mystic Topaz is an example of a coated gem.
Composite gemstone
A composite gemstone is a precious gemstone glued on to a base.
For example an Opal doublet has a black coating or Black Onyx base glued to the back to intensify the colour, or simulate a Black Opal. If a gemstone’s price is too good to be true, or if the gemstone is too perfect for the price, ask for a gemmologist report.
Diffusion
Diffusion is the process where chemicals (used along with high temperatures) change the colour and/or create an asterism (star effect, for example; Star Sapphire) inclusion. Usually only the surface colour of the gemstone changes and only to a depth of about half a millimetre, so if the gemstone is chipped or recut the original colour is visible. The hardness and original physical properties of the gemstone are not affected by the diffusion process.
Lasering
This process drills very small holes, via a laser, into a gemstone to provide access to an inclusion which detracts from the beauty of the gemstone. The inclusion can then be vaporized or bleached to make it less obvious (if it has not already been burned out by the lasering). Under magnification, laser holes are visible when viewed at the correct angle. Lasering is sometimes used on Diamonds.
A lasered Diamond would be classified in the imperfect or slightly imperfect category, regardless of the improvement in apparent clarity and should be priced accordingly.
Gemstones that are not enhanced
There are some gemstones that are not usually enhanced.
These include Garnets and Spinel.
New technology in gemstone treatment is always changing and improving and many treatments are very difficult to detect.
Disclosure
With some gemstones enhanced by specifically defined treatments, a vendor should always disclose any known treatments or enhancements (remember, they may not always know themselves). Most vendors are honest and forthcoming, but it is YOUR RESPONSIBILITY TO ASK.
There is nothing intrinsically wrong with gemstone treatments as long as you are made aware of their use. New treatments are being developed all the time, and gemmological testing centres are constantly revising and updating their testing regimes to combat the unidentified treatments that can slip through the cracks. Most gemstones (with the notable exception of Garnet) have a particular treatment, or series of treatments, that are commonly used to increase the marketability of the gemstone.
Gemstone Terminology
Brilliance/Lustre – Intensity of the light reflected from a Gemstones or Pearls surface.
Briolette – A pear shaped bead covered with facets, usually with a hole drilled through the top point.
Cabochon - A Gemstone cut has no facets, usually flat on the base with a polished dome shaped surface.
Carat - Unit used to measure the weight of Gemstones – 1 carat = 0.2 gm
Facet - Flat polished surfaces cut on the surface of Gemstones. A facet is used to create sparkle and to reflect the light from inside the Gemstone.
Faceting – The process of making facets on a Gemstone.
Fire polished – Glass beads are passed through a flame or furnace, melting the surface of the beads and removing mould/machinery marks, giving greater lustre and a smoother surface.
Focal bead – A focal bead is defined as the bead in a jewellery design that has the most impact.
Gauge – Gauge is the American unit used to measure the thickness of wire.
Inclusion – Is a foreign substance such as a mineral, internal stress fracture or some other imperfection inside a gemstone that occurs when the crystal is forming. Inclusions are like a "finger print” for a gemstone. Different Gemstones have a different range of inclusions. Some gemstones, such as Sapphire, show different inclusions depending on where they are mined. Inclusions can sometimes be the only way to establish whether a gemstone is created or natural.
Internal characteristics - Imperfections located within the gemstone.
Lariat Necklace – A Lariat necklace is defined as a necklace without a clasp. Lariats can be tied or wrapped in a number of ways creating a variety of looks, and they can be made with any bead/chain/wire wrapped loop combination.
Loupe - Small magnifier used to examine gems, usually 10X.
Nugget – Natural/irregular shaped beads can be either polished or faceted.
Pit/Cavity - Small opening on the surface of a polished Gemstone.
Polished – The gemstone surface has been made smooth
Quality - Term that is used to describe the colour, clarity and cut of a stone.
Rough - Gemstone as it is found in nature before undergoing any manufacturing process.
Rutilated -needles of the mineral Rutile (Gold colour) found in stones.
Simulated – Manmade Gemstones manufactured from natural or synthetic substances to resemble genuine gemstones.
Tourmalated- needles of Black Tourmaline found in stones.
Gemstone Hardness
All gemstones have different hardness measured by Mohs’ scale.
The scale was developed by German gem expert, Friedrich Mohs in 1812. The scale measures gemstones from 1 to 10.
1 is the most easily scratched while 10 is the most scratch resistant.
Knowing gemstones hardness properties can help when making jewellery designs.
Prevent scratching of gemstones by using gemstones of similar hardness.
|
Scale of Hardness |
Resilience |
Stones |
|
0-1 |
Can scratch with your fingernail |
Talc |
|
1-1½ |
Can scratch with your fingernail |
Gypsum
Sulphur |
|
2-3 |
|
Amber |
|
2-4 |
|
Ivory |
|
3-4 |
Can scratch with a coin |
Pearl
Coral |
|
3½-4 |
|
Malachite |
|
4 |
Can scratch with a knife |
Rhodochrosite |
|
4½ |
Can scratch with a copper coin. |
Calcite
Kyanite
(lengthwise to grain) |
|
5-6 |
This gemstone scratches softer glass. |
Fluorite
Lapis Lazuli
Turquoise |
|
5½-6½ |
|
Opal |
|
6-6½ |
Can scratch with a steel file |
Kyanite (across wise to grain)
Moonstone |
|
6½-7 |
Can scratch with dust. Most dust is silicate (which is a
7) clean all your gemstones below 7 with a dust free cloth. |
Quartz
Tanzanite
Apatite
Peridot |
|
7 |
Can scratch with glass and will scratch all other gemstones of lower scale |
Citrine
Amethyst |
|
7-7½ |
|
Tourmaline
Garnet |
|
7½-8 |
|
Emerald |
|
8 |
This gemstone will scratch lower value gemstones and quartz. |
Topaz |
|
8½ |
|
Alexandrite |
|
9 |
This gemstone will scratch previous stones |
Ruby
Sapphire |
|
10 |
This gemstone will scratch previous stones. Saws and drill-bits are often diamond-tipped. It will cut through most things. |
Diamond |
All you need to know about Coral
Coral is a natural gemstone made from skeletons of a small, cylindrical, tube-like colonizing marine animal called polyps and are related to jellyfish and anemones. Coral is composed primarily of calcium carbonate or Aragonite. Calcium Carbonate is a chemical compound, (formula CaCO3) commonly found in rocks in all parts of the world. It is the main component of marine organisms, shells, snails and Pearls. The origin of its colour comes from natural pigments such as Carotene.
After harvesting from the ocean, Coral goes through a series of processing steps prior to being used for making jewellery, including chemical treatment, tumbling, heating, sawing, and polishing.
Coral is a very soft gemstone, and needs to be treated gently.
Clean by wiping gently with a moist soft cloth. Because it is naturally porous, Coral can be damaged by exposure to chemicals such as perfumes and hair styling aids, so store carefully to avoid scratches.
Sponge Coral
Sponge Coral looks like a sponge with a distinct fan-shaped appearance. The holes of sponge coral are the homes of individual polyps and rarely close, the open vacant homes give sponge coral its name. Found mainly in the South China Sea, 95% of all sponge coral is stabilized and filled, some also dyed.
Sea Bamboo Coral
Sea Bamboo Coral looks like branches with joints made of protein (like the bamboo it gets its name from). The natural colour is creamy white with brown or black highlights. The harder sections are cut out and dyed to make small beads or Cabochons, while larger pieces are used with the original banded patterning.
Gem Corals
Gem Corals are hard tree-like structures usually found attached to sea floors.
Import and sales of Natural Red Coral are prohibited in Australia.
Fossilized Coral
Fossilized Coral occurs through the process of turning organic material into stone, also known as to be petrified.
All you need to know about Pearls
A Pearl is an organic gem, grown in an oyster or mussel, they are almost never flawless.

Cultured Pearls are produced by placing a bead, called the nucleus or irritant
(usually a piece of shell or plastic); inside an oyster or mussel which will then coats the nucleus with nacre (see nacre) to produce a Pearl.
Pearls should always be wiped over with a damp cloth, to remove body oils, makeup
and dirt before storing. Keep Pearls in their own separate soft lined box to prevent scratching
Pearl characteristics
The value of a Pearl is determined by its lustre, surface quality, shape, colour and size.
Lustre: Lustre is the most important factor when choosing Pearls. It is a Pearl's ability to reflect light and show depth and shine on its surface. The inner glow of a Pearl and the surface brilliance defines lustre. The thicker the nacre the better the lustre. Lower quality cultured Pearls surface can appear dull or chalky.
Nacre: The calcium carbonate based substance secreted by an oyster or mussel to coat an irritant, producing the surface of the Pearl.
Surface: The surface of Pearls can be smooth to heavily blemished.
Blemish: A blemish is a surface defect on a Pearl, including cracks, chips, dull spots, wrinkles, spots, holes, bumps and pits. Gem quality Pearls may have minute blemishes when viewed under magnification.
Shape: It is very rare to find a perfectly round Pearl. The rounder the Pearl the more valuable it is.
Colour: Pearls range in colour from white to black and natural colours are more valuable than dyed. The colour of the Pearl you purchase is entirely personal preference. Pearls with a natural exotic colour will command a much higher price than a dyed Pearl.
Size: Pearls are measured in millimetres. The larger the Pearl the rarer and more valuable it is.
Freshwater Pearl
A Freshwater Pearl is a Pearl that is cultured in a mussel from a freshwater lake. Freshwater Pearls come in many shapes, round to button and from flat flakes to rice, and in many different colours. Freshwater Pearls are less expensive than Salt Water Pearls. More than one Pearl can be cultivated at a time in a fresh water mussel.
Salt Water/Akoya Pearl
An Akoya Pearl is cultured in an Akoya oyster in the ocean, usually around Japan. They can be up to 10mm and grow in a limited selection of colours. If they are dark grey, bluish, violet, nearly black or intense bronze, assume they have been dyed.
South Sea
South Sea cultured Pearls are generally larger than the Japanese cultured Pearls, and grow naturally into a variety of exotic colours by being cultivated in a variety of oysters and locations.
Tahitian Pearls
Tahitian Pearls are a good example of naturally coloured black Pearls. Natural Tahitian Pearl colours include deep grey (black), purple, green, gold, and silver.
Keshi Pearl
A Keshi Pearl is formed when the oyster rejects or spits out the implanted nucleus, forming 100% nacre Pearl without a nucleus. Keshi Pearls can be fresh or salt water and are usually small in size with widely varying shapes, and colours. Due to their solid nacre content they tend to have high lustre. Keshi Pearls are not considered a natural Pearl as they are a bi-product of the culturing process and are not a natural occurrence.
Tahitian and South Sea Keshi Pearls are much rarer, as Pearl farms are now X-Raying oysters, and when a nucleus free oyster is found, they then re-introduce a nucleus before a Keshi has time to form.
Biwa Pearl
Biwa Pearl are freshwater Pearls, the shape is usually long and thin with a wavy surface. The nucleus is made from organic material rather than shell.
Shell Based Pearl
A Shell Based Pearl is an imitation Pearl, made by painting a shell bead with paint made from crushed Pearl shell.
Fake/Faux
Fake Pearls can be made from glass, plastic or resin.
Pearl Shapes
Baroque Pearl - An irregular, unusual shaped Pearl.
Blister Pearl - A Pearl that has grown onto the inside surface of the oyster or mussel, dome shaped on one side and flattened on the other.
Button Pearl - A squashed round shaped Pearl where one side of the Pearl is flattened.
Mabe Pearl – Mabe Pearls are grown by gluing a plastic nucleus to the inside surface of an oyster or mussel, resulting in a domed shape with a flattened back.
Potato Shape Pearls – Slightly irregular oval shape resembling a potato, most potato shaped Pearls are freshwater from China.
Rice shape Pearls- A regular, oval-shaped Pearl that resembles a grain of rice, most rice Pearls originate from China or the United States.
How to Tell Real Pearls from Fake Pearls
The following list can help you determine if a Pearl is real or not.
- Real Pearls are not perfect and have ridges, bumps or pits in and on their surface. Examined with a magnifying glass, irregularities of genuine Pearls will be apparent.
- Pearls vary in size and shape on the strand and will also not be perfectly round; unless they are very high quality and very expensive.
- Tooth Test; (NOT 100% reliable) rub the Pearl over your teeth, a real Pearl feels gritty while a faux Pearl feels smooth. Alternatively Pearls can be rubbed against each other and you will feel the same results (Faux Pearls can be made to simulate a real Pearl and some very high quality real Pearls will feel very smooth).
- The Light Test; Hold the Pearl strand up to sunlight or under a very bright light. Unless they are of very high quality, colour will not match perfectly on real Pearls.
- Feel the weight: Real Pearls are heavier than plastic, resin, or hollow glass Pearls, although good glass fakes may have the same weight as real Pearls.
- Look at the hole; the hole in real Pearls will be small. Fake Pearls often have larger holes and the coating of fake Pearls is more likely to flake/peel/chip near the hole, than on a real Pearl. Holes of fake Pearls sometimes have a rounded indent, while real Pearls are mostly flat near the hole. Examining the hole is also good check to see if they are dyed.
- X-Ray and checking by a gemmologist.
When cut in half; you will see a Pearls true nature. Natural Pearls are made of layering nacre. Man-made Pearls when cut in half, the coating tends to flake away from the centre bead.
How to dye your own Pearls
You can dye genuine or faux Pearls by using commercially available fabric dyes. Follow the instructions on the pack and check for suitability by following the check list:
Colour test before dying the whole strand. Record the process for an exact colour match.
Check the colour does not change/fade when exposed to sunlight. A test over an entire day is sufficient.
When dying while still on the strand be aware colour may be more intense around the edges near the hole.
Getting started in Making and Selling your Jewellery
- Make your product as unique and high-quality as possible.
- When you are out on "Jewellery Business” always look clean, neat and professional, simulate the fashion trend of your target market.
- If opening a shopfront, having an established client base will help initially to generate income. Consider "Location, Location, Location” for walk-in clients.
- When displaying your Jewellery collection, present it in an appealing fashion. An attractive, attention-grabbing display will sell better.
- When wearing your Jewellery creations, know what they cost; you may be complimented on your Jewellery and "sell it off your neck”.
- Wear your designs everywhere you go, the best way to display them is with simple, plain coloured outfits making your Jewellery design the focal point.
- Start small with inexpensive pieces to sell to friends, work mates and family. Make your Jewellery designs as unique – but as high quality – as possible. Start with a small mark-up, and after building your reputation, you can then slowly increase your prices, do not over price your product and lose your market.
- The more personalized the service provided to clients, the more successful you will be. Make your client feel that you are interested in their opinion and they have your full attention when dealing with them.
- Donate Jewellery designs to local charity functions to promote your business.
- Visit local stores to see if they might be willing to sell your Jewellery designs. Always have your Jewellery designs with you and allow retailers to select their own stock. They will be more enthusiastic to sell something they like themselves. Leave/sell/give them displays to make your Jewellery designs more appealing. Try to negotiate a system (if the retailer is willing) where your stock is purchased – and if it does not sell in a negotiated time period – Jewellery designs will be rotated keeping it fresh.
Build a level of trust with retailers and visit them at regular intervals. Stock left on consignment can be expensive and add to business costs, as payments can be slow. Do not leave the same design with a retailer for too long a period of time. Consider all small local businesses to be potential markets for your Jewellery designs, but do not over-saturate an area.
- Know your target market, current designs trends, price expectations and make sure your designs appeal to your target market.
- Always show up for appointments and don’t be late.
- Presentation is important. Show your clients you care about your Jewellery, presenting in smart individual packaging, offer free gift wrapping if you wish.
- Have a selling gimmick if holding Jewellery parties. Offer the hostess an incentive to make Jewellery party a success and provide party invitations which best describe you and your unique Jewellery designs.
- Keep your Jewellery design collection stored in a simple system that can be ready to "go and show” at short notice.
- Make a business budget and stick to it, don’t get carried away with your spending.
- Set up as a business. The long-term costs may be worth it in order to access wholesale discounts. A small business course may be invaluable.
- Set up a credit card payment system.
- Have some business cards or fliers to hand out to potential clients and always carry them with you.
- Always take a deposit for commissioned Jewellery designs and provide a written quote. Clients can ask for specific Jewellery designs to be created but may change their mind later. Be sure to advise clients that late changes (or cancellation) to the Jewellery design will incur a fee.
- Keep a detailed list of suppliers and individual component costings.
- Keep in touch with clients by regular email or SMS. Create an email newsletter or Facebook page to advise clients of new Jewellery designs/showcases or sales. Email newsletters are an economical way to keep in touch with your clients.
- Keep a record of what clients purchase; noting preferred design length, colours and general preferences.
- Repair or alter Jewellery for as little cost as possible to keep good client relations.
- Do not sell a Jewellery design to a client just to receive a sale. Give your honest yet respectful opinion on the suitability of their choice. They will appreciate your quality of service and return later, remembering your integrity. This is also a good way to generate a greater public profile. Good and honest service will be commented on.
- Adding an extension chain to necklaces can save time and money, if you do not need to re-thread, to fulfil an individual customer’s length requirement.
Anniversary Stones
|
Anniversary
in Years |
Gemstone |
|
1 |
Gold Jewellery |
|
2 |
Garnet |
|
3 |
Pearl |
|
4 |
Blue Topaz |
|
5 |
Sapphire |
|
6 |
Amethyst |
|
7 |
Onyx |
|
8 |
Tourmaline |
|
9 |
Lapis Lazuli |
|
10 |
Diamond |
|
11 |
Turquoise |
|
12 |
Jade |
|
13 |
Citrine |
|
14 |
Opal |
|
15 |
Ruby |
|
16 |
Peridot |
|
17 |
Watches |
|
18 |
Chrysoberyl |
|
19 |
Aquamarine |
|
20 |
Emerald |
|
21 |
Iolite |
|
22 |
Spinel |
|
23 |
Imperial Topaz |
|
24 |
Tanzanite |
|
25 |
Silver Jubilee |
|
30 |
Pearl Jubilee |
|
35 |
Emerald |
|
40 |
Ruby |
|
45 |
Sapphire |
|
50 |
Golden Jubilee |
|
55 |
Alexandrite |
|
60 |
Diamond Jubilee |
|
70 |
Sapphire Jubilee |
|
80 |
Ruby Jubilee |
|
|
Birth Stones
|
Month |
Gemstone |
|
January |
Garnet |
|
February |
Amethyst |
|
March |
Aquamarine |
|
|
|
April |
Diamond |
|
May |
Emerald |
|
June |
Pearl, |
|
Moonstone |
|
|
|
July |
Ruby, Carnelion |
|
August |
Peridot, |
|
|
|
September |
Sapphire, Lapis |
|
October |
Opal, |
|
Tourmaline |
|
November |
Topaz, Citrine |
|
December |
Tanzanite |
|
Turquoise |
|
|
Buying a Diamond
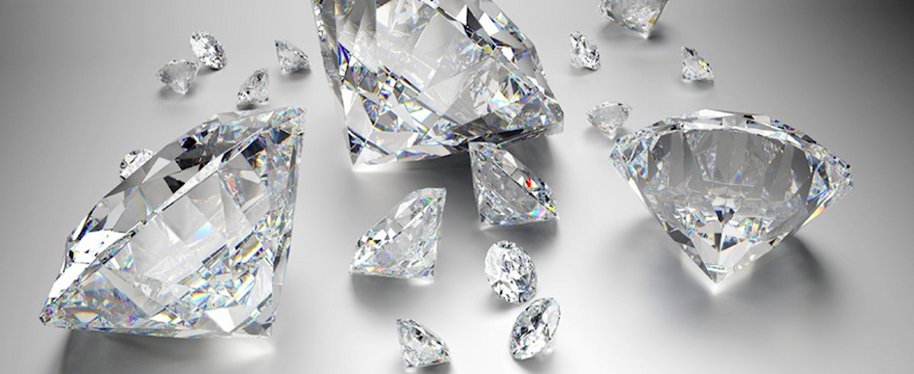
- A diamond is the hardest naturally occurring material; only a diamond can scratch another diamond.
- Diamonds are the only gemstone made of a single element; Carbon.
- The price of a diamond is determined by "the 4 C’s”; caret, colour, clarity and cut.
When purchasing a diamond, ask to see the Certificate, this Certificate should be from an accredited Gemmological Laboratory, it defines the individual diamonds characteristics including caret, colour, clarity, cut, finish, grade and treatments.
If a diamond does not have a certificate and is expensive, ask the Jeweller to get one. If the jeweller refuses, it would be very unwise to purchase that stone. Asking and obtaining a GIA Certificate is a standard practice in the Jewellery Industry for expensive items.
The Certificate, if available, should always be included with your documentation when purchasing a diamond. An insurance valuation can also be requested to be supplied.
Wholesale diamonds are priced per carat; you will pay a $ value per carat which is multiplied by the diamond carat weight. Jewellery often will have a TDW on the price tag this describes the Total Diamond Weight of the item.
Caret=Weight: 1 carat is equal to 0.2gm, the larger the diamond the more expensive.

Colour: the second way a diamond is graded is by colour. White Diamond colour grades range from D to Z; D is colourless and the highest grade; Z is light yellow stone, and the lowest grade.

Diamonds are also available in a range of fancy colours which are very rare and valuable if un-enhanced. True fancy colour diamonds (such as yellows, pinks, and blues) are graded on a separate colour scale.
Clarity: the third way a diamond is graded is by the interior purity of the stone. Diamonds are graded from FL to I with the highest grade being FL.
Under a Microscope
|
VVs |
Vs |
Si |
P |
|
Very, very slight inclusions |
Very slight inclusions |
Slight inclusions |
Inclusions |
Diamond clarity grades are:
FL – flawless- no inclusions or surface blemishes visible under 10 x magnification.
IF- internally flawless-no inclusions but the stone may have some surface imperfections visible under 10 x magnification.
VS1 and VS2- Very Slight - inclusions are very difficult to see under 10 x magnification.
VVS1 and VVS2 – Very Very Slight – inclusions are very difficult to see with the unaided eye.
SI1 and SI2 - slightly included- inclusions are larger and may be visible with the unaided eye.
I 1, 2 and 3 - Included– inclusions are visible to the naked eye.
Cut: the fourth way a diamond is graded is by cut, which also includes the shape. The cut of a diamond is the only quality determined by man. Cut is determined by the proportions and finish of the surface. Cut is very important to appearance; a large, clean, high colour stone, if cut poorly cut can produce a diamond that has no sparkle or "life”.
Some diamonds also display a characteristic called Fluorescence
Fluorescence –it is the glow shown when a diamond is exposed to ultra violet light, the glow can be a variety of colours. Not all diamonds have Fluorescence and it is not considered in the grading of a diamond, but can have some affect on the price. The absence or presence of Fluorescence is noted on the certificate.
For further information check the web the GIA website.
http://www.gia.edu/